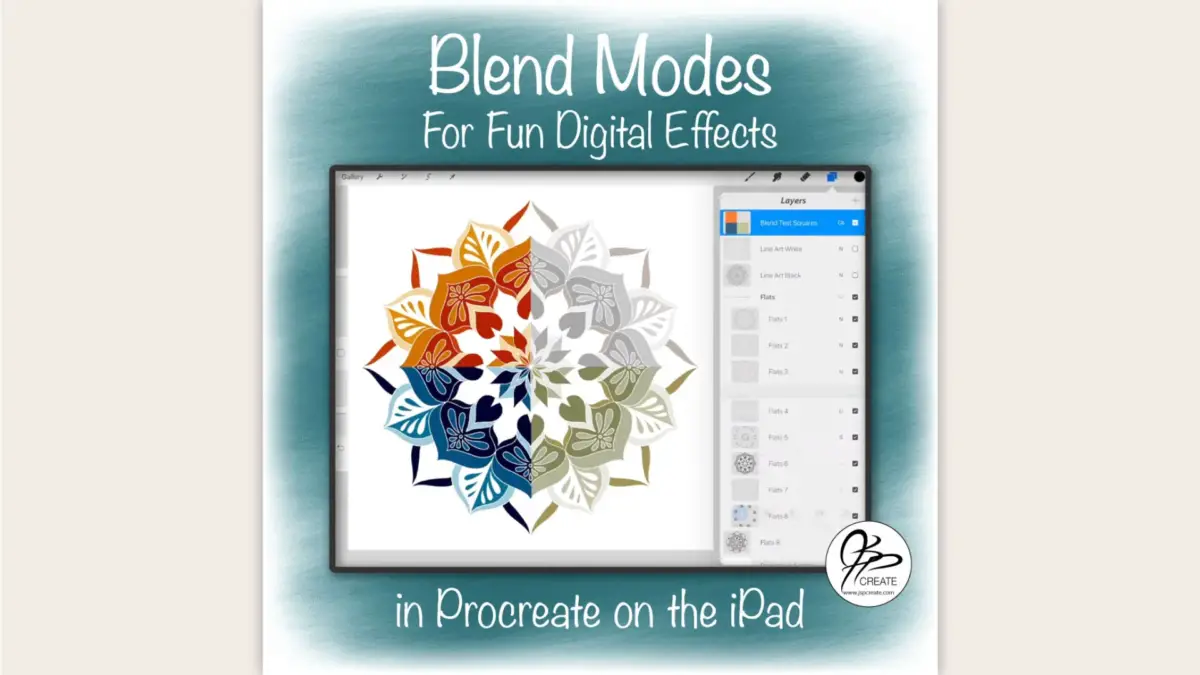
Are you curious about what these “Blend Modes” are all about in digital software and apps? They are an easy and fun way to achieve beautiful and creative effects with your art. In this post I cover some of the basics methods I use to explore and experiment with blend modes, taken from my full class Magical Art
[/fusion_text][fusion_text columns=”” column_min_width=”” column_spacing=”” rule_style=”” rule_size=”” rule_color=”” hue=”” saturation=”” lightness=”” alpha=”” content_alignment_medium=”” content_alignment_small=”” content_alignment=”” hide_on_mobile=”small-visibility,medium-visibility,large-visibility” sticky_display=”normal,sticky” class=”” id=”” margin_top=”” margin_right=”” margin_bottom=”” margin_left=”” fusion_font_family_text_font=”” fusion_font_variant_text_font=”” font_size=”” line_height=”” letter_spacing=”” text_transform=”” text_color=”” animation_type=”” animation_direction=”left” animation_color=”” animation_speed=”0.3″ animation_delay=”0″ animation_offset=”” logics=””]
Starting Simple with Blend Modes
In this post I will give you a quick overview of how I play and experiment with blend modes in my own art. This will be the start of a three part series. The second post will cover texture brushes and I will also share a portion of the class with you on creating your own texture brush to use in your designs. In the third post I will give you an overview of how to start working with multiple layers and multiple textures for even more options. If you are interested in learning more you can check out my full course I offer on all these techniques and my process.
Shades and Values
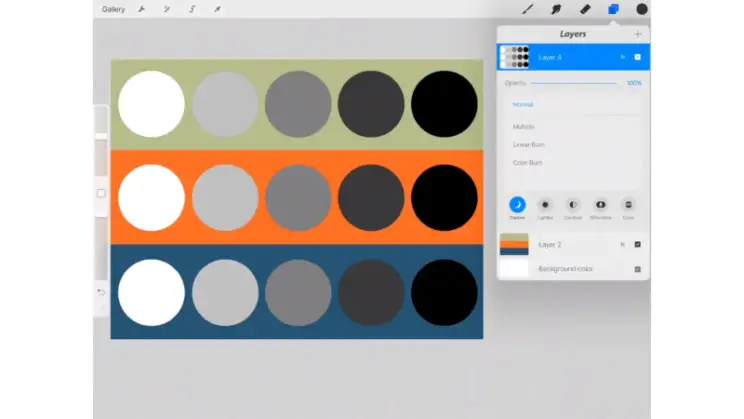
To start with I set up a layer with 5 different circles. They contain white, 25% grey, 50%grey, 75% grey and black. This is on one layer. I set up a second layer that is a range of three coloured stripes which cover 3 different values. This means if I were to desaturate the colours to grey tones, they would represent three different values of grey.
Working Through the Blend Modes
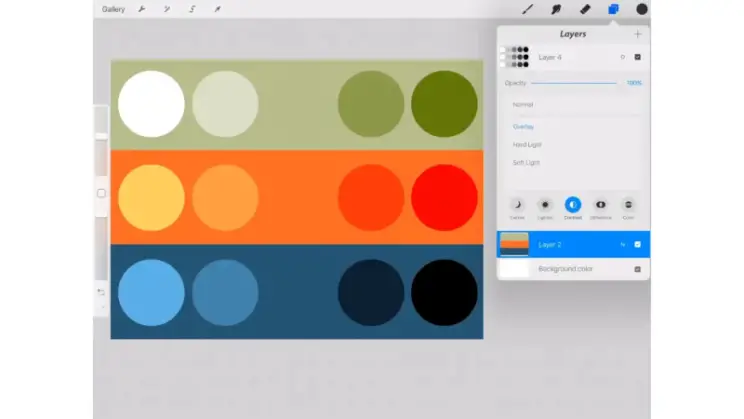
With the circles on the top layer, I start to run through the blend modes. In my full class I walk you through this process step by step in Procreate on the ipad. Procreate has a nice range of blend modes in their app. You could however, use the concepts I’m showing you in any digital app or program with similar blend modes. This is a great way to get a nice visual of how the colours react with those underneath. Each blend mode behaves in slightly different ways. After I have worked through them all, noting how they are affected, I will then switch the positions of the two layers putting the circles on the bottom. Once again I will work through the blend modes, using the new top layer of striped colour values.
Create a Grey Scale Drawing
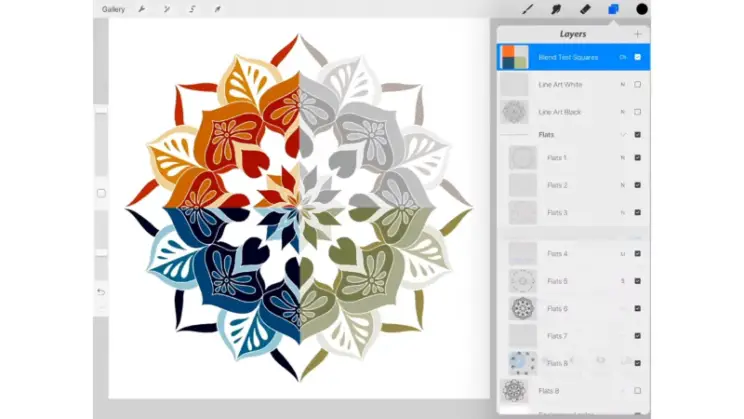
Once I have played around with the basic colour circles, I can then move on to a piece of line art with fills. I use a mandala I created that has a range of grey tones as the fills. The layer I have on top is divided into 4 sections. Each quarter has one of the three original colours and one is left blank. Now I can visually see how the values will effect my drawing. Using the same process I then run through the blend modes while noting which effects I like.
Working on Multiple Layers for More Effects
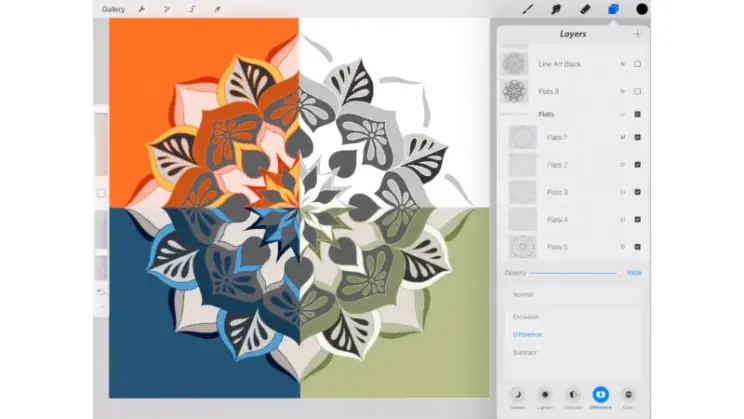
I have my grey fill sections separated out onto different layers. The coloured squares layer is then moved to the bottom of the pack. Now we change the blend modes of the individual grey tone layers to come up with more variety of looks.
I believe the best way to really learn about Blend Modes is to experiment with them. Play around with colours on multiple layers. Change up the blend modes, until you start to make sense of what you are seeing. They can be intimidating at first, but as you start to understand how to use them, you will see how many fun options they open up for your art.
In my next post I will continue to explore the blend mode theme using textures. I will also share a video lesson from the full class on how to create your own texture brush from a photo you have taken.
Check out the full class here or come on over to my courses page where you can view all the trailers for my classes on hand drawing in pen and ink, and digital drawing on the ipad.
Thanks for joining me and getting creative.
“I found I could say things with color and shapes that I couldn’t say any other way – things I had no words for.” – Georgia O’Keeffe